The first step in making a stereograph is to take some pictures with your camera using the “cha-cha” method with a conventional film camera or digital camera. A stereo image requires two separate images, one for each eye. The “cha-cha” method involves shifting your weight from one foot to the other between the two exposures of the same object. This movement will have the effect of displacing the camera laterally between exposures. If using film it will be easiest to start with color print film. Slides present different mounting challenges and need a stereo viewer especially made for slides. I would suggest that you begin by shooting vertical rather than horizontal format photos. However, you should use whatever format will help you maintain good vertical alignment. After the prints are made, separate them into pairs.(this will be obvious). The first step in stereograph making will be to set the individual prints of a pair side by side and align horizontally similar objects in each of the pairs. Digital camera users or those scanning images to a computer do the same by opening both images at the same time in your image editing program. You can position the separate images so you can view them either parallel or cross-eye. The images on this page should be parallel viewed.
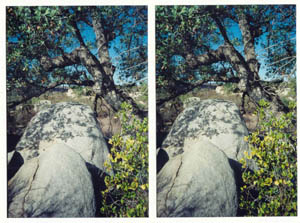
You might want to try to view the pairs stereoscopically at this time, either parallel or cross-eye. This exercise will confirm which image is the right eye image and which one is the left eye image. If when you attempt to fuse the images the stereo effect seems very strange, the pairs need to be swapped. After swapping try it again and you should see the image in 3-D. I find it easiest to do this initial freeviewing using the parallel method because it helps me understand how to properly “set the window”. Setting the window is important because it makes viewing the stereograph more comfortable on the eyes. More on window setting later. Start by aligning objects in each image horizontally. Be prepared to trim off the bottom of each print but not yet.
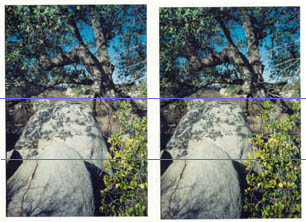
Next align objects vertically. This is best done visually as objects in one view will not line up in the other view due to the different perspective in each view.
When everything is aligned horizontally and vertically, trim off or crop the bottom of each print along a common horizontal line so that the bottom of each print becomes a reference line for aligning the prints for viewing.
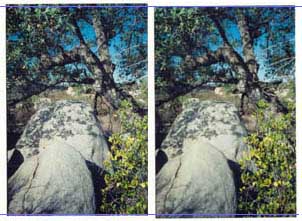
Next trim the sides of the prints leaving as much of the image intact as possible. At this time we will deal with the window. You will want to view the stereo scene as if through a window. The idea is to always have a window between you and the view. This just seems to look better in terms of keeping everything in its place visually. A window will always be formed but sometimes the view will look as though it is spilling through the window toward you. Occasionally this works visually, but not often. To better understand the principle of the window, try making a square shape with your hands about 10″ in front of your face. Now alternately close your eyes at one second intervals being aware of what each eye sees, especially along the left and right edges. This is how you will treat the image edges to form a window between you and the view. The right eye image will have more image along the left edge than the left eye image and the left eye image will have more image along the right edge than the right eye image.
You should play with window placement so that you will know how you can manipulate it so it appears near and far.
The images should be cropped for the window placement at this time. You can try varying degrees of trimming and observe the effect on the stereo image. The final left and right images must be the same size both horizontally and vertically, so if you trim 1/2″ from the right side of the right eye image, you must trim the same amount from the left side of the left eye image. Once trimmed, the images can be viewed either parallel or cross-eye with the same results. If you are mounting the images on a card or processing them digitally, leave a small space between them of about 5/16″. If you are working with digital images manipulate the images as if they were paper prints, side by side and then save each image file with its own name. With both image files opened, expand the canvas size on the left image and copy the right image onto that canvas but in its own layer. When you have them aligned, flatten the image and crop to the final size. You can adjust the image size and thus the file size in the image option. Those working with prints are now ready to glue the pairs to a stiff piece of tag board or mat board with rubber cement. The usual size of each image is between 2-1/2″ and 3″ wide and 3-1’2″ high. Mount them on the board with a space between them making sure that they line up exactly.
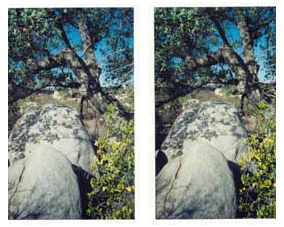
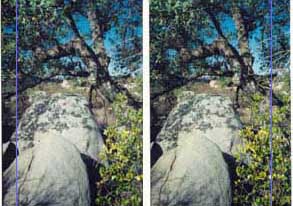
Notice how the scene now seems to all be behind a vertical oblong cut out of the page. This is the window. In the first pair, the original scanned images, the foliage on the right and above seemed to protrude into the space between the window and the viewer, confusing the image. It is ok if an object protrudes through the window as long as it’s origination point is beyond the window. It should never seem to originate out of the window frame or on the viewer’s side of the window as does the foliage in the original scanned pair. Notice that it doesn’t seem to matter how tall a stereo pair is, only how wide it is. The pair can now be trimmed for height if desired.